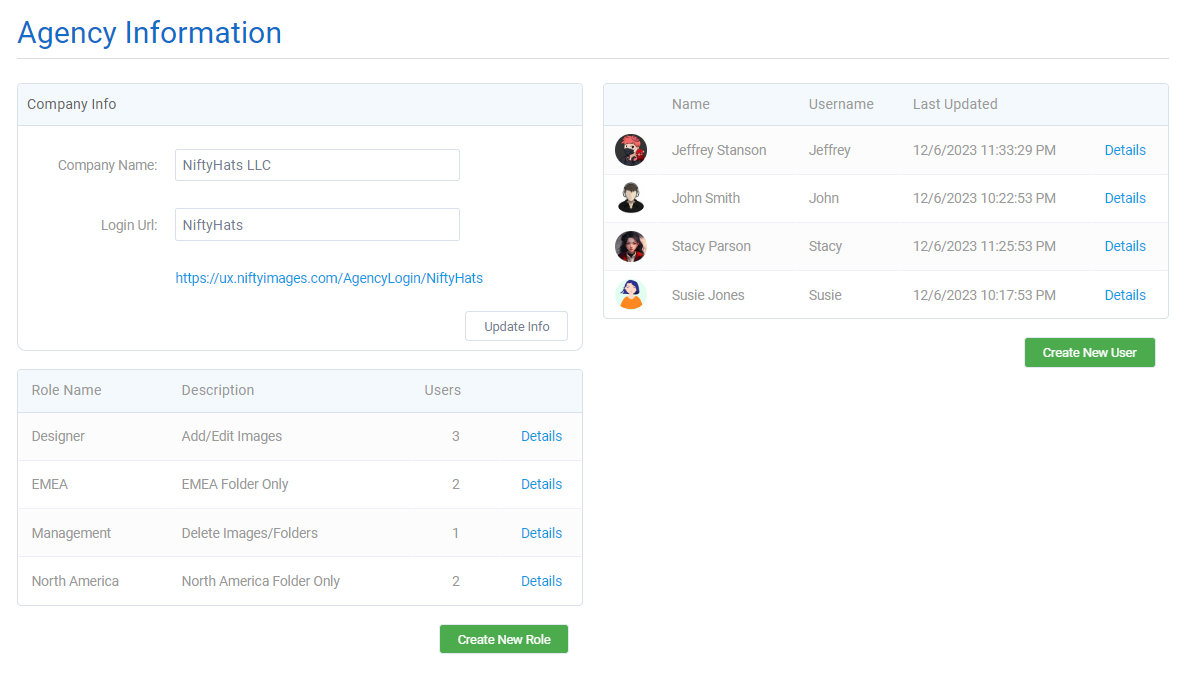
We made it easy for your whole team to create campaigns within your NiftyImages account.
Our new Agency Model, available with our Enterprise Plus plan, allows you the ability to create and assign access levels for each user. A unique url will be generated in the account for login. And no need to request changes from us - your admin will have the ability to update users and roles at any time.
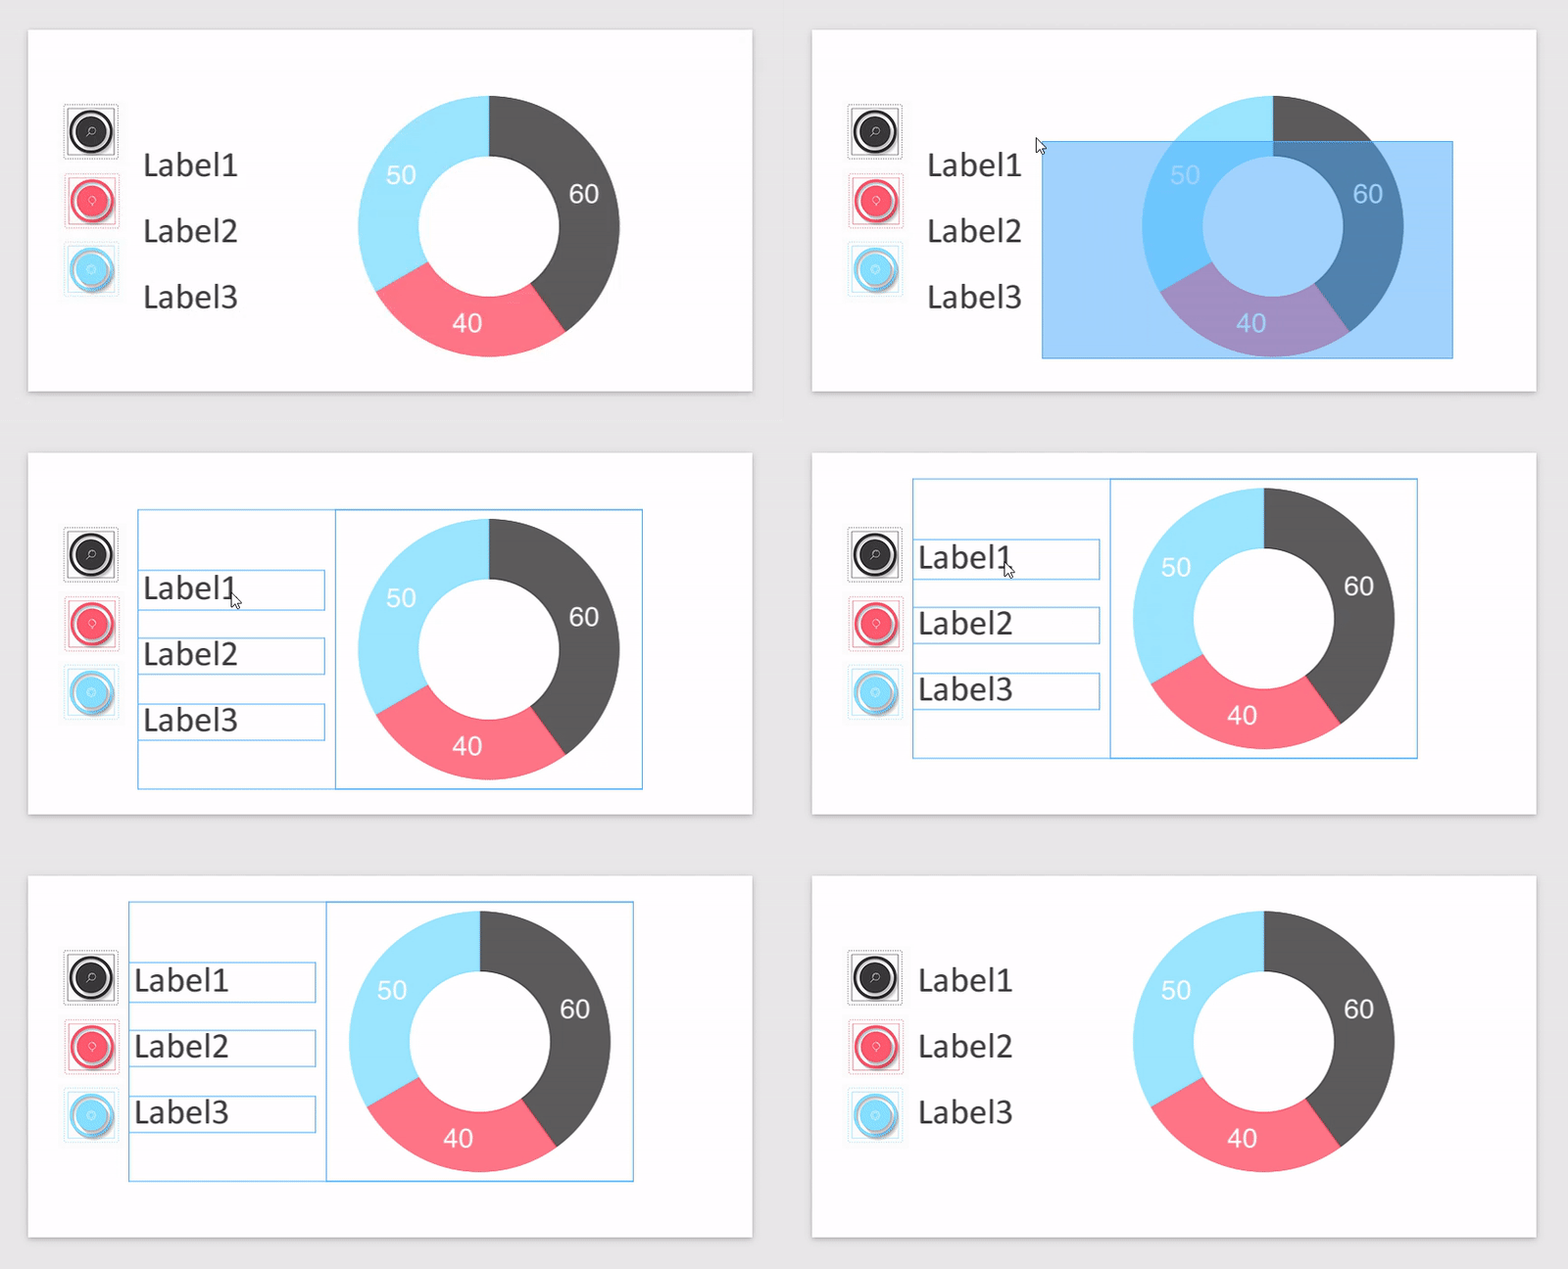
You can now select and move/delete/copy multiple elements at the same time. Select multiple elements by holding down the Shift key and clicking on the elements you want, or drag like the image below.
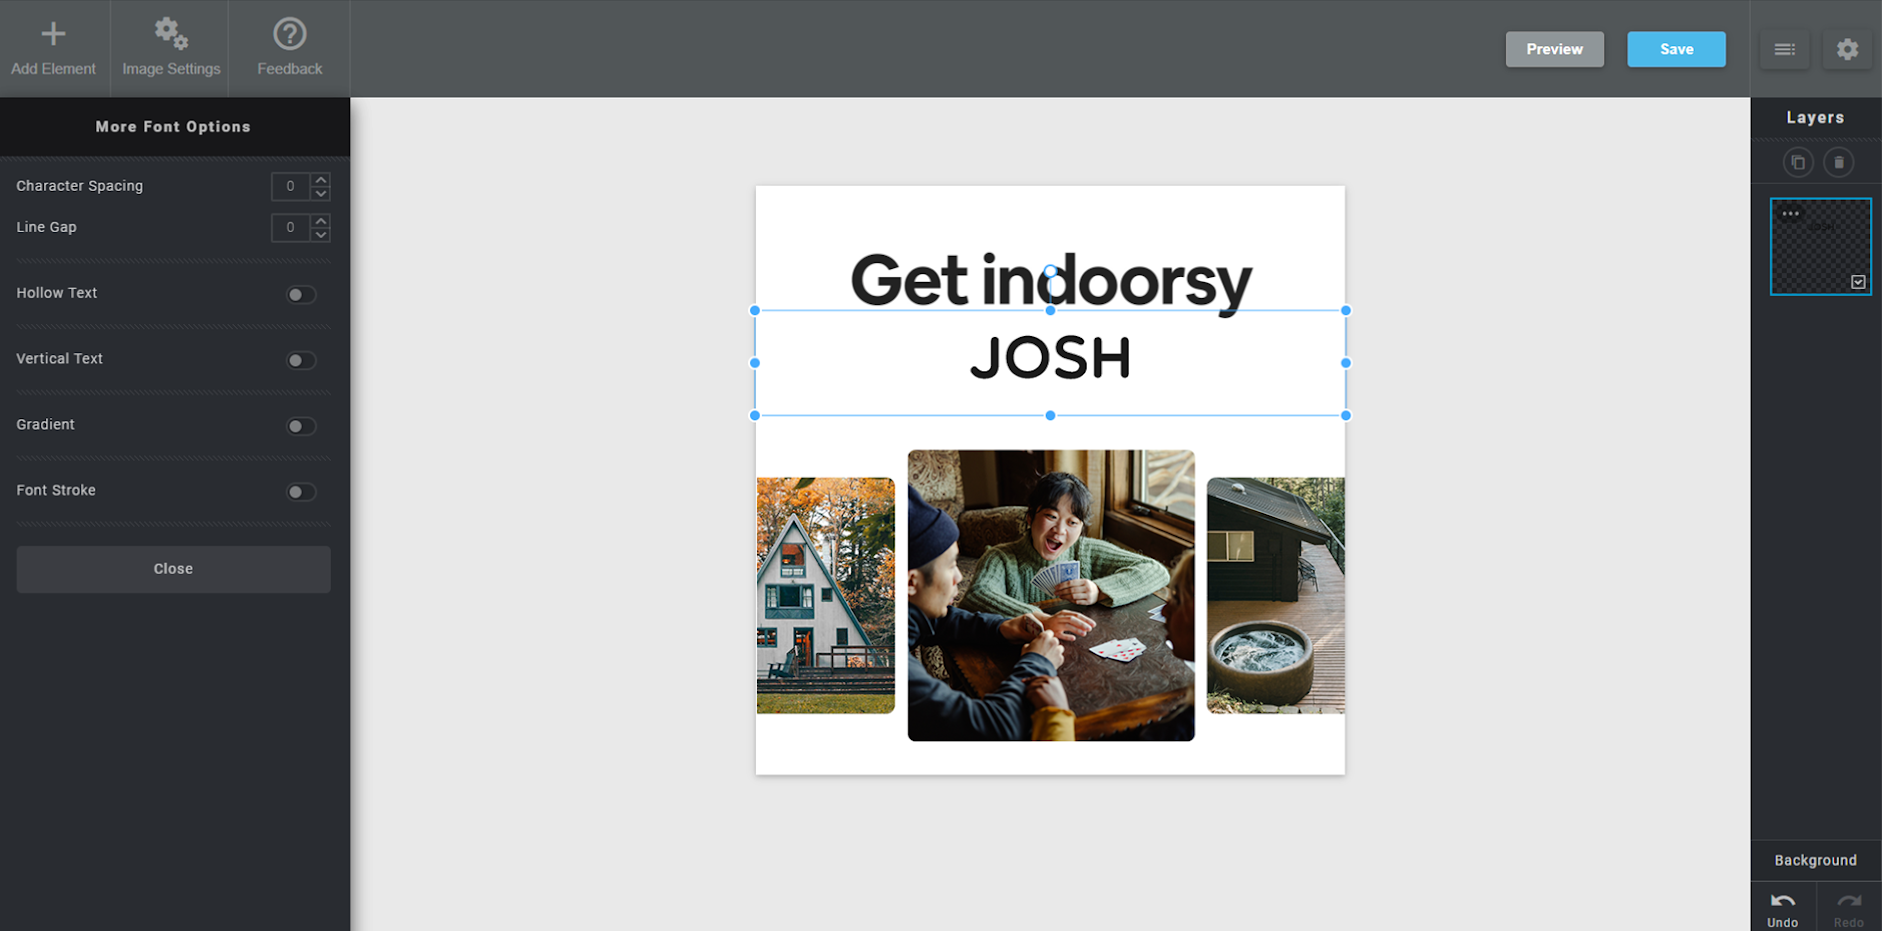
You now have greater control with the Character Spacing and Line Gap options in the NiftyImages Studio.
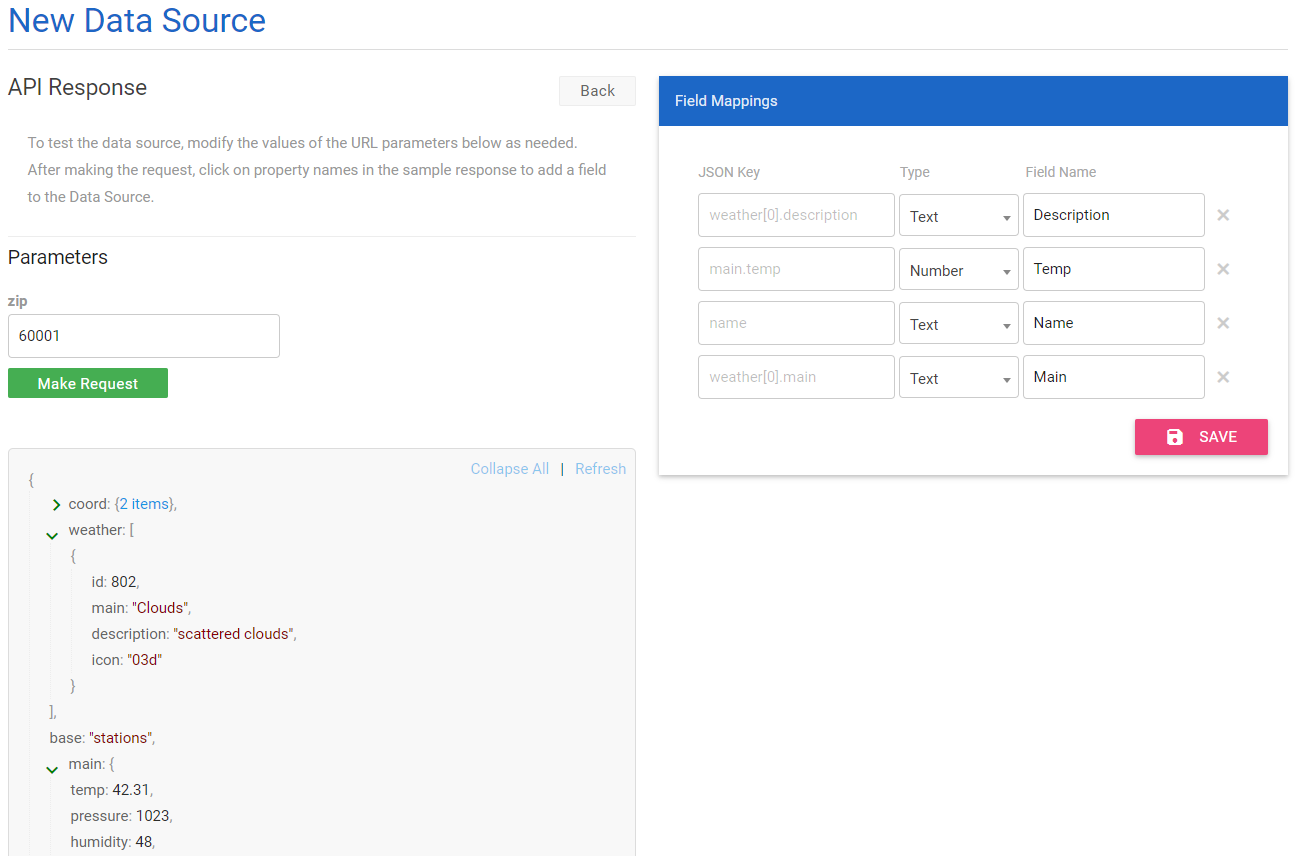
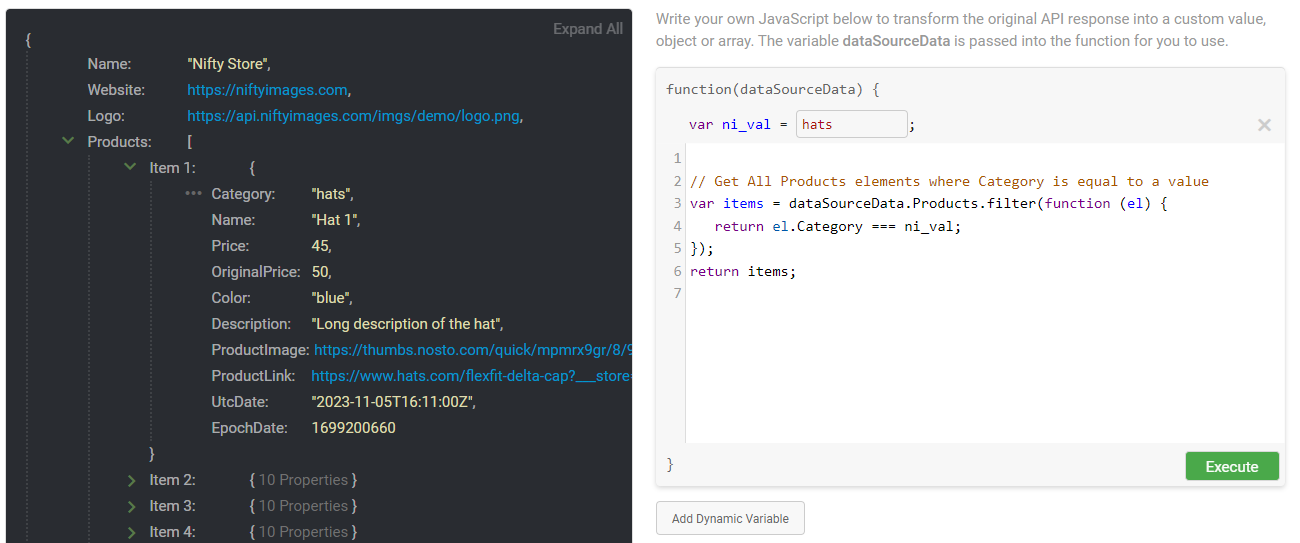
No need to get IT or developers involved when your existing API isn't exactly what you want to show in your images. You can now use custom JavaScript to filter, manipulate, or search your API.
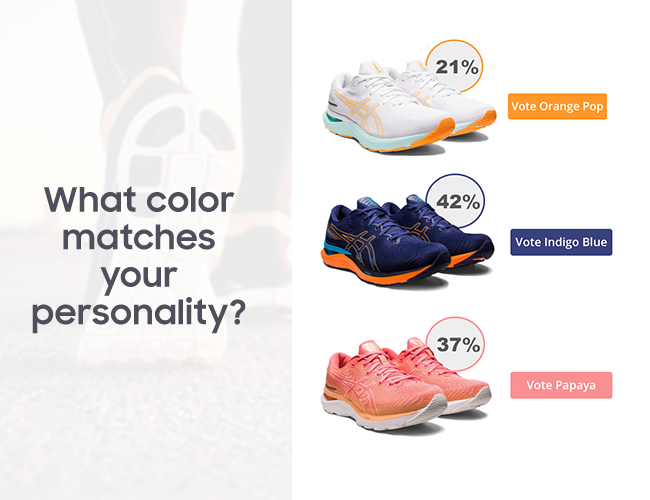
Use gamification to increase user engagement and collect valuable data on your subscribers.
You change the Font Color and Background Color dynamically through the URL.
Change Font Color to White (Hex: FFFFFF) by adding the color=FFFFFF parameter to the URL
<img src="https://img1.niftyimages.com/tlp/tecd/yacd?color=FFFFFF" />
Change Background Color to Blue (Hex: 0000FF) by adding the background=0000FF parameter to the URL
<img src="https://img1.niftyimages.com/tlp/tecd/yacd?background=0000FF" />
Change both the Background Color to Black (Hex: 000000) and the Font Color to Orange (Hex: FF6600) by adding both parameters to the URL
<img src="https://img1.niftyimages.com/tlp/tecd/yacd?background=000000&color=FF6600" />
You can perform basic layer manipulation for personlized images through the URL.
Hide any layer by appending LayerName.hide=true to the URL
<img src="https://img1.niftyimages.com/lp/tecd/yacd?LayerName.hide=true" />
Show any hidden layer by appending LayerName.show=true to the URL
<img src="https://img1.niftyimages.com/lp/tecd/yacd?LayerName.show=true" />
Change the Text Color or Shape Color to any hex value by appending LayerName.color=hexvalue to the URL
<img src="https://img1.niftyimages.com/lp/tecd/yacd?LayerName.color=ff6600" />
Change the Background Color of your image to any hex value by appending Background.color=hexvalue to the URL
<img src="https://img1.niftyimages.com/lp/tecd/yacd?Background.color=ff6600" />
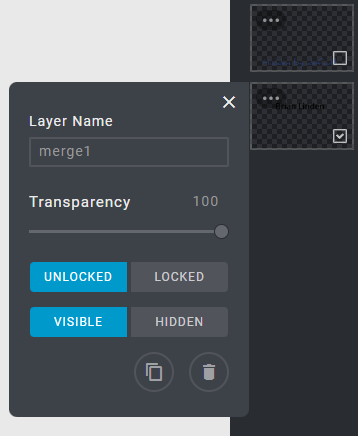
You can find or change the layer name by clicking on the three dots in the upper left hand corner of the layer (image below).
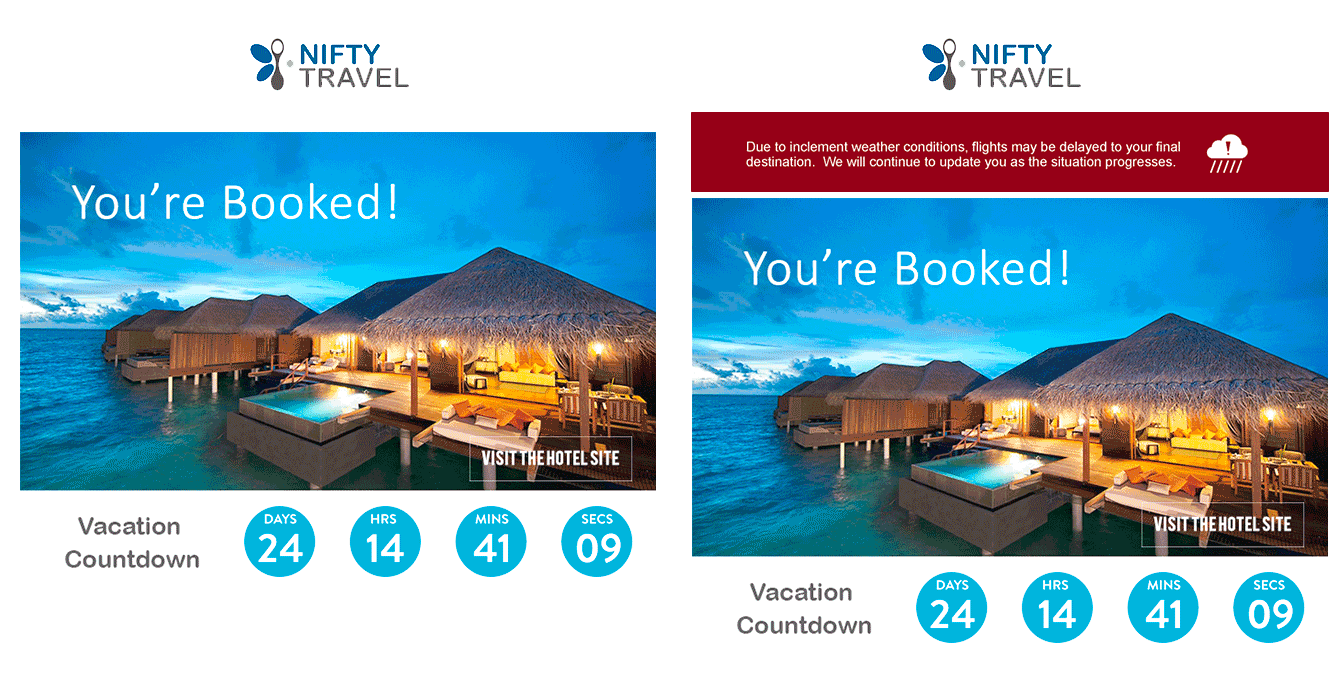
You can now display a critical message on campaigns that have already been sent, and you have the ability to toggle them On and Off
We only charge for opens when they are toggled on, so why not put them in every email campaign in case of an emergency or status update?
Use ESP merge tags to highlight dates of importance for each subscriber. This feature gives our clients the ability to store any data they want in NiftyImages, then show that data in real time.
Data Stores are the biggest update to NiftyImages in the past two years. This feature gives our clients the ability to store any data they want in NiftyImages, then show that data in real time.
This could be the latest Tweet, the newest review given on their site, most recent donation to their organization, the next event/game, or subscriber information that they can’t easily store in their ESP.
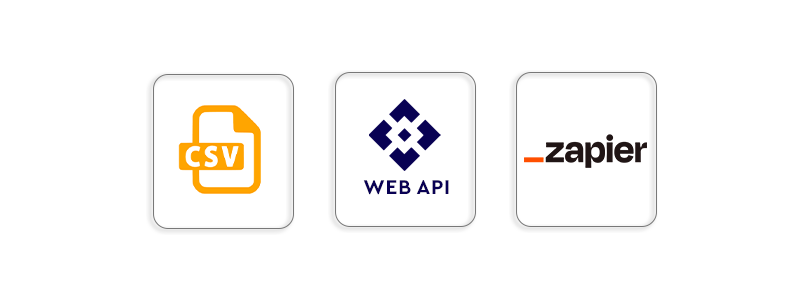
We give you a variety of ways to populate your Data Store, such as uploading a CSV, using our API or Zapier to easily automate the data transfers from over 4,000 different apps.
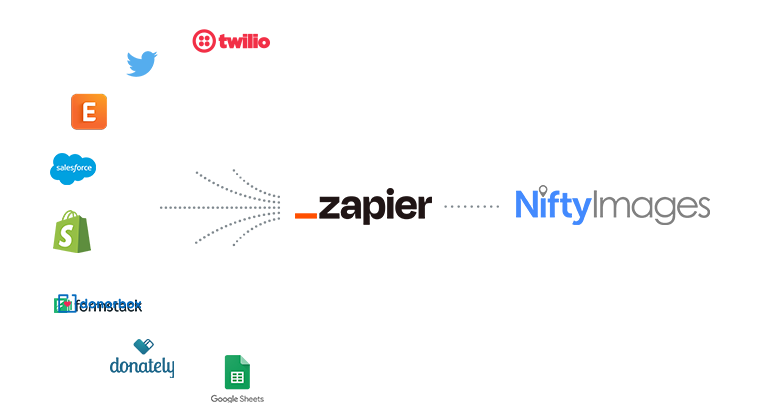 Learn more about creating Data Stores here
We have updated our Data Stores options to now offer more advanced filtering and dynamic query options.
You can create more than one query per Data Store and easily design images in our Personalized Image Editor through the Data Sources button.
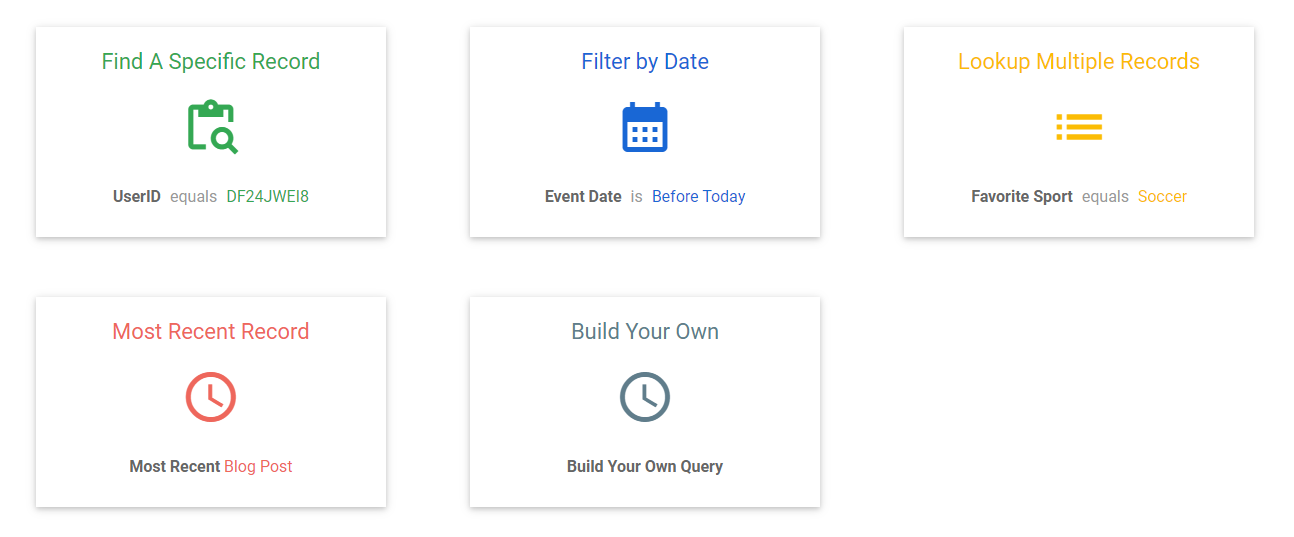 Learn more about New Query Options
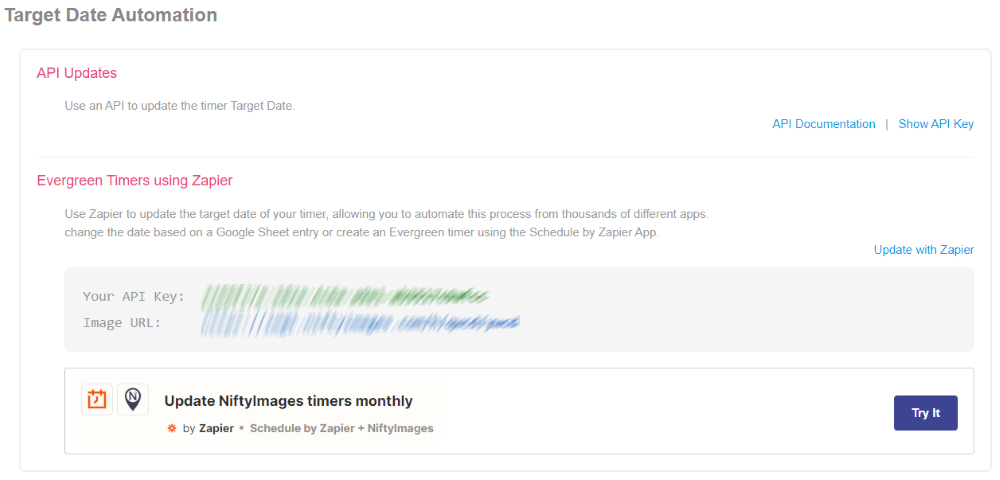
We added an API Call to update a timer's Target Date. You can also easily use the Schedule Zap to create an Evergreen timer.
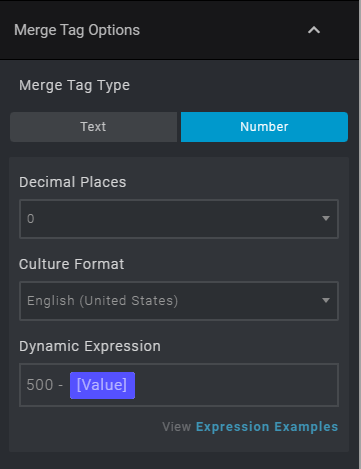
It's now even easier to manipulate your Merge Tags and Data Source fields with Dynamic Number Expressions.
If your Merge Tag is a points field, the example below would show how many points they need for the next reward. (How many until they reach 500)
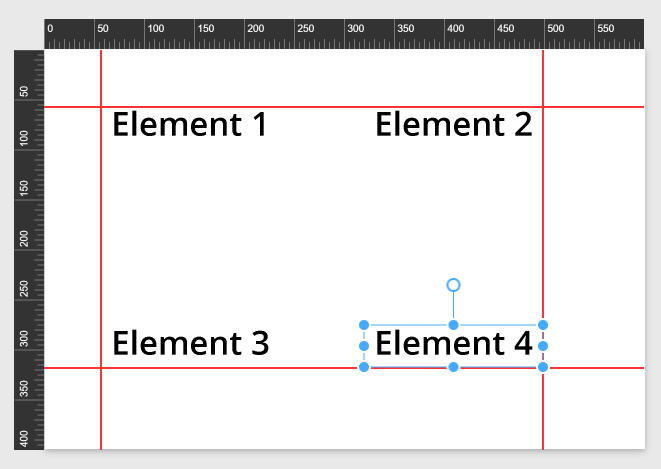
Sometimes users have multiple elements that you want aligned to a custom position.
Now you can enable Rulers to easily position those elements exactly how you want them.
Once the Rulers are showing, simply click on them and drag a red guideline onto your canvas for precision positioning.
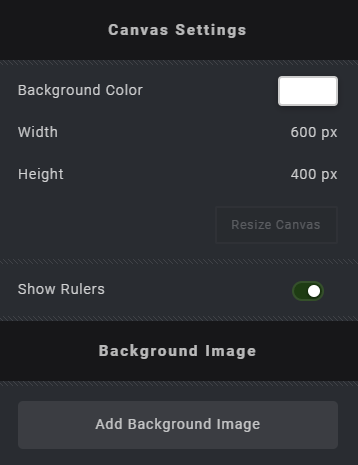
To enable the Rulers, click on the large Image Settings button up top to view image options. Check Show Rulers and they will appear around your image.
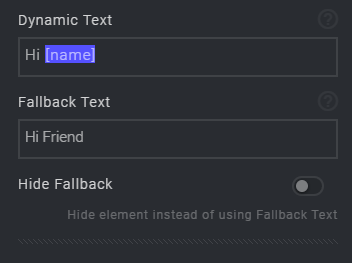
Our users told us that sometimes they want to hide an element if the Merge Tag, Data Source Value, etc... isn't present or valid.
Now you can check the box Hide Fallback which will do just that.
We have updated our Data Sources options to now offer more advanced filtering and display options for CSV files.
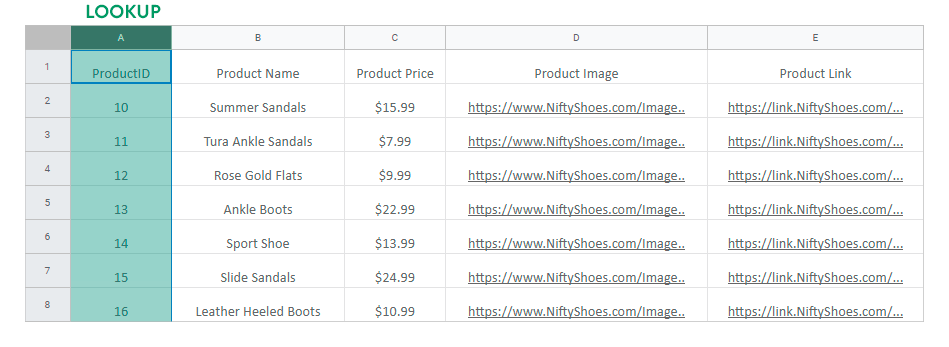
CSVs enable you to refence specific information such as products or user profiles, show events based on current date/times, and build general queries for advanced use cases.
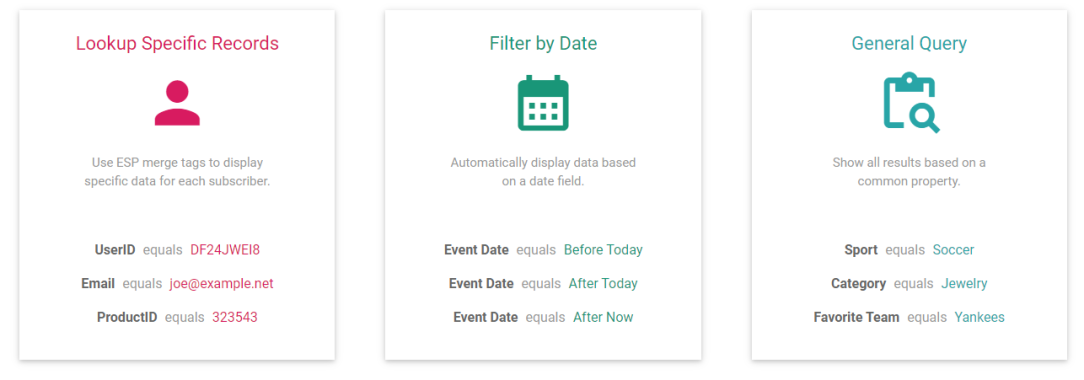
Below is an example of a live schedule hooked up to a CSV File using a Filter by Date query.

We've made it super simple to test your NiftyImages for use in Mobile Messaging.

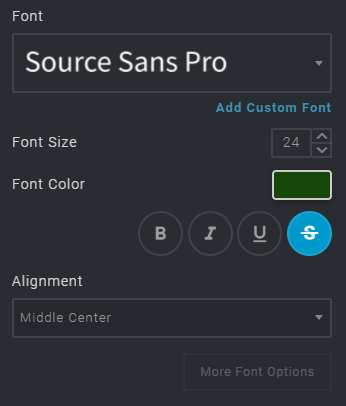
We've added the option to put a Strikethrough when customizing the fonts for your Merge Tags, Data Sources, Text Blocks, etc...
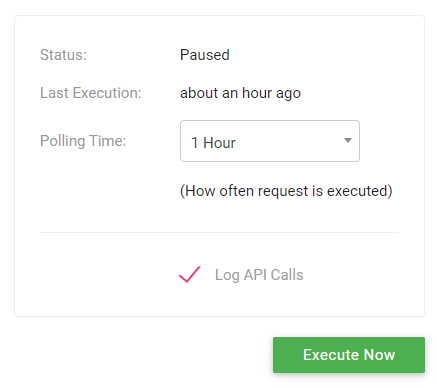
We have made it even easier to execute a Polling Data Source, with the simple push of a button.
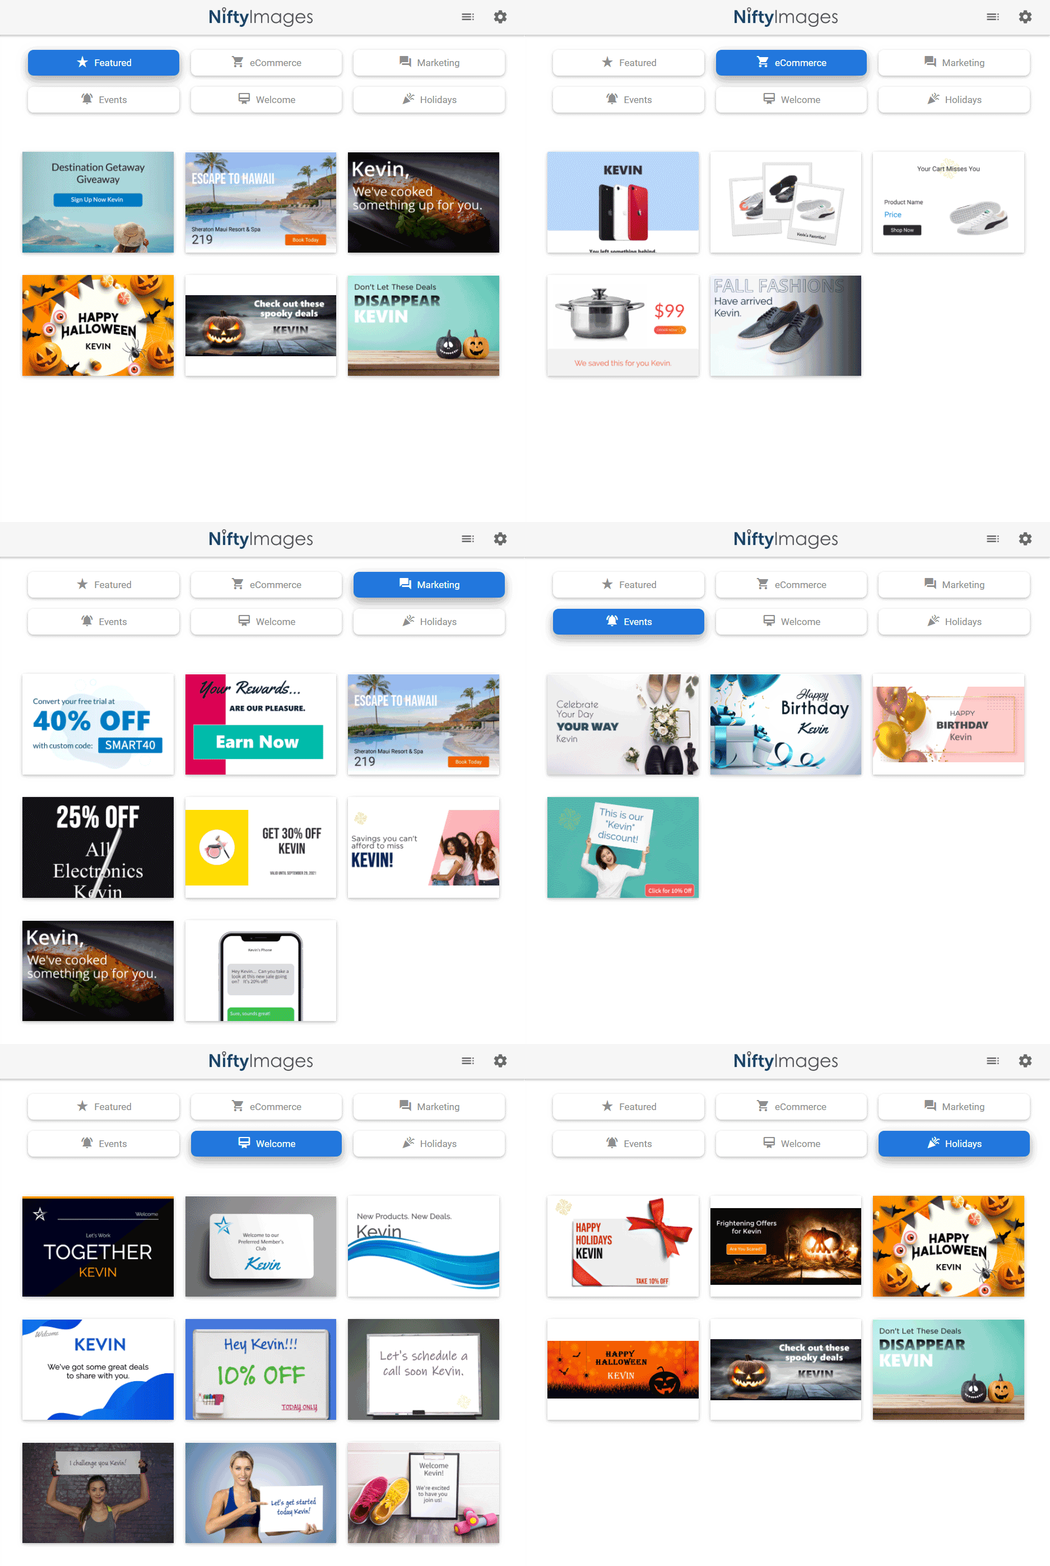
We have added 30+ templates for you easily customize and use in your email campaigns and/or website.
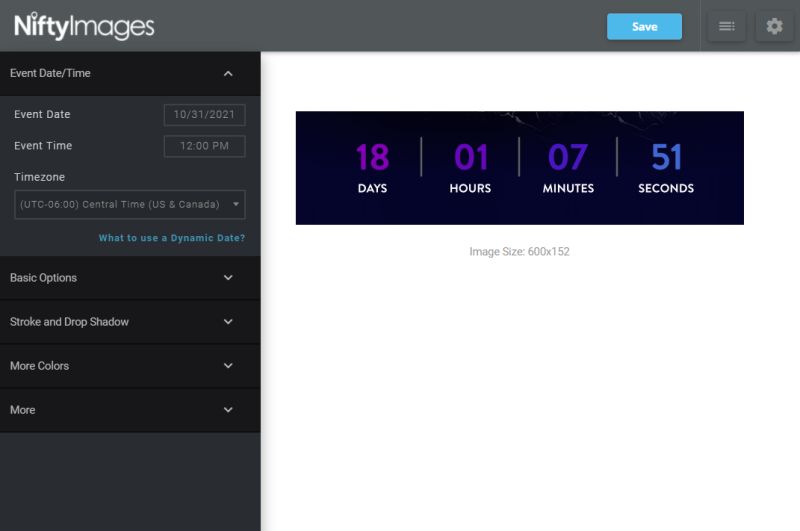
What is this for?
Read More Here
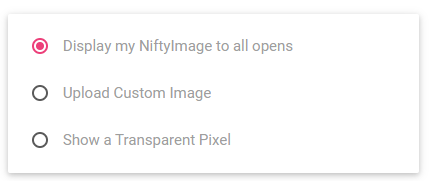
You can now pass in a Prefix and Suffix in the query string for charts.
This is advantages when you know the customer viewing your chart is in a different country, use the new merge tags to append the appropriate currency indicator.
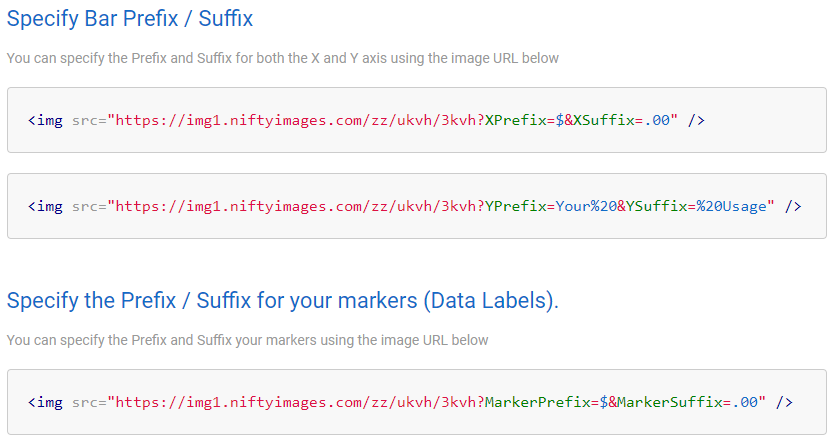
Look for these new options in the Dynamic Options tab after you create a chart.
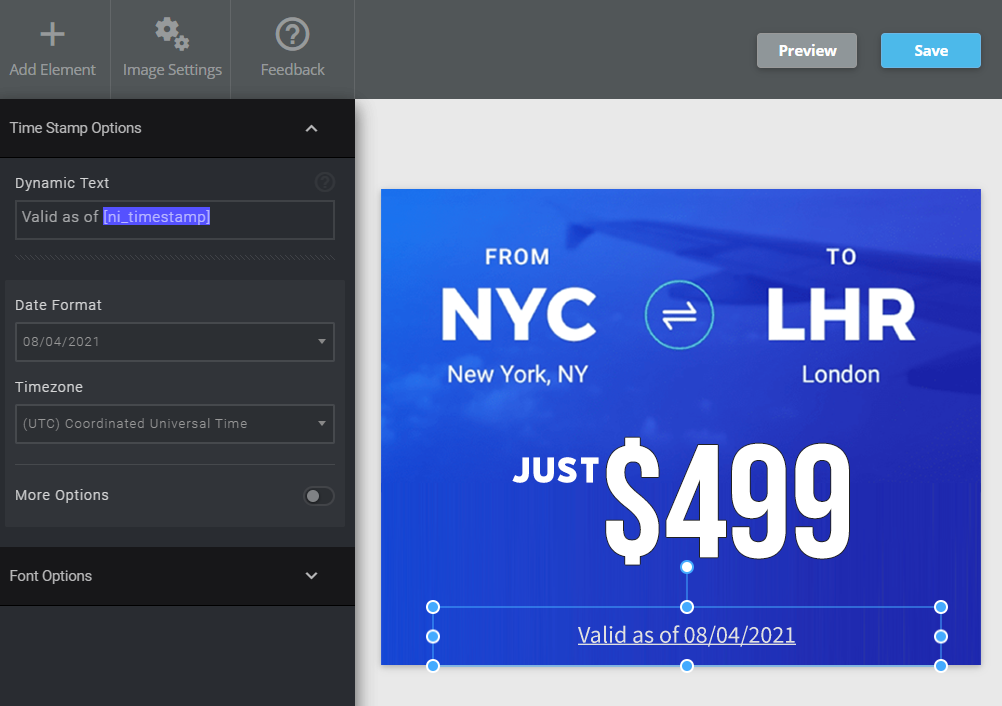
We've made it extremely easy to add the Current Date and Time to your images using our TimeStamp merge tag. The TimeStamp will update each time the image is loaded, ensuring that any time based offers or sales are accurately represented in your emails when they are viewed.
You can control how the Date and/or Time format is displayed, including the Timezone and Culture.
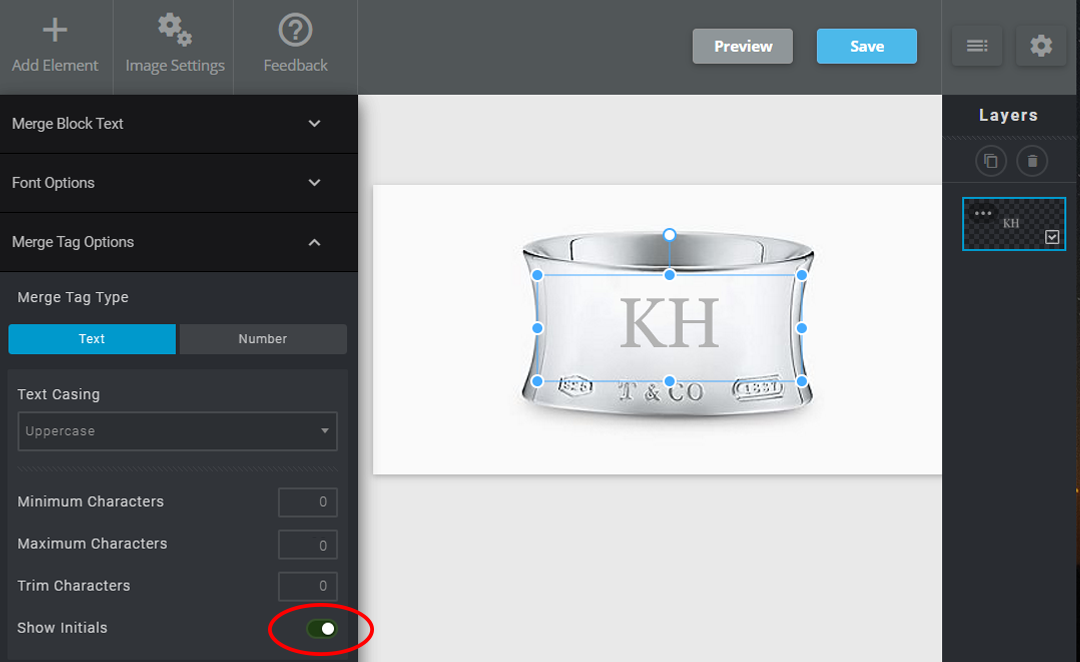
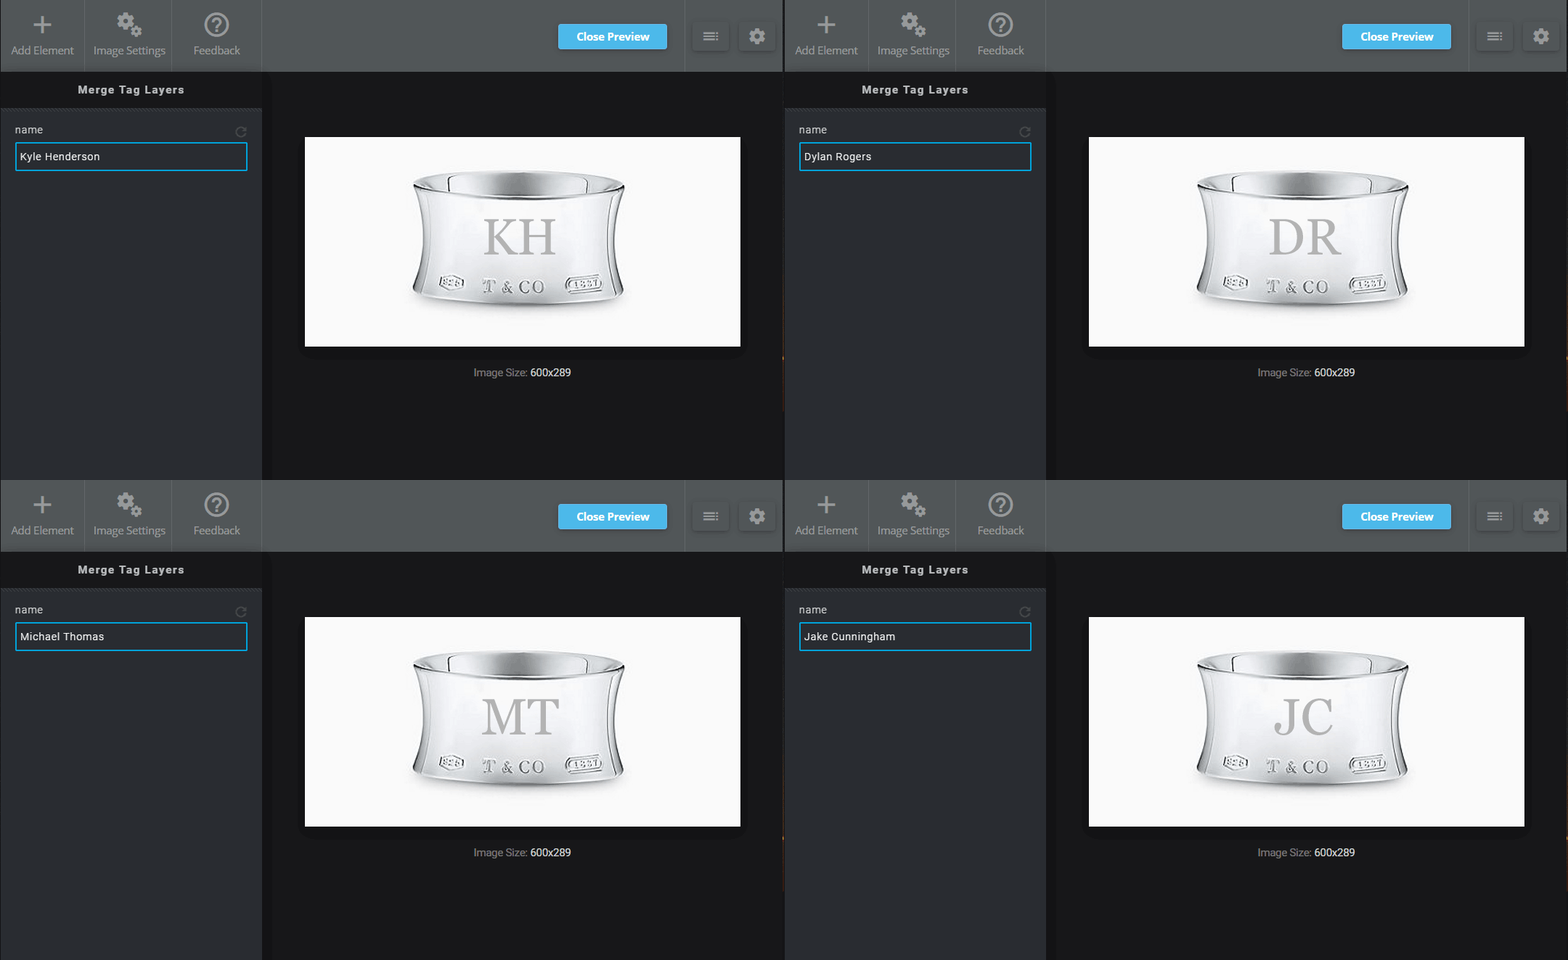
With the check of a button, you can now display just the initials for your Merge Tags.
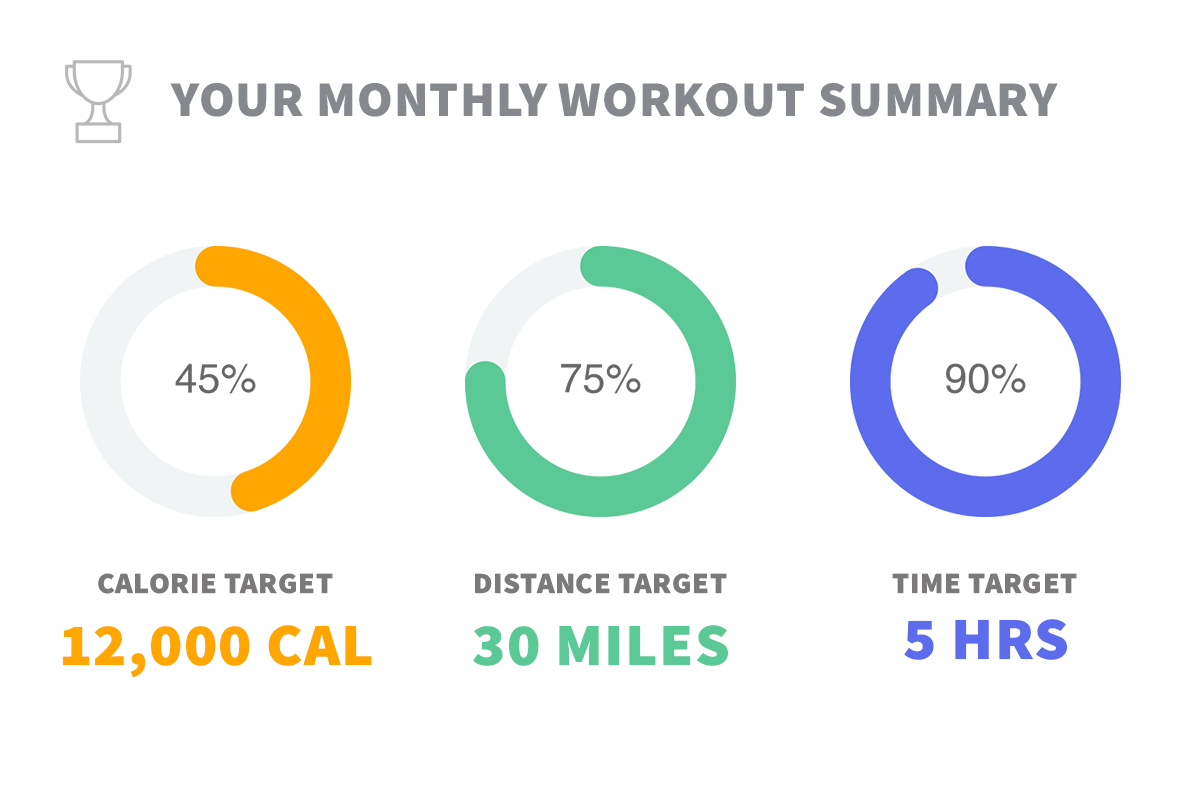
It is now easier to have multiple charts of the same type in one Personalized Image.
Below is one image that shows different Radial Gauge Charts for one subscriber, all with different values.
Use Lists to Filter, Sort and Search For items that might not be in the desired order
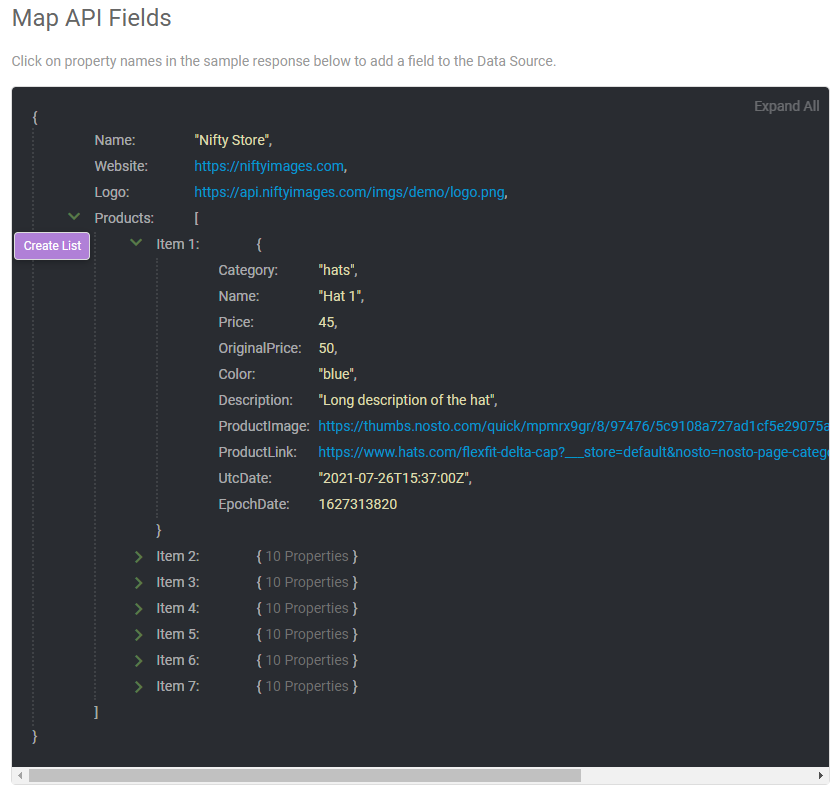
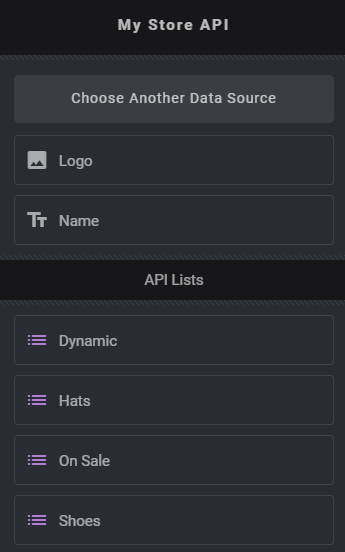
You will see these lists when creating a Personalized Image from the Data Sources menu.
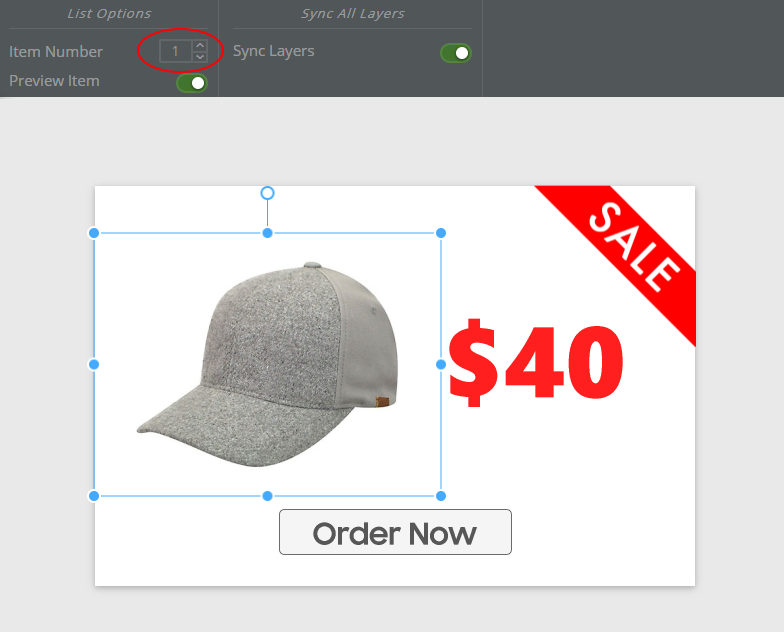
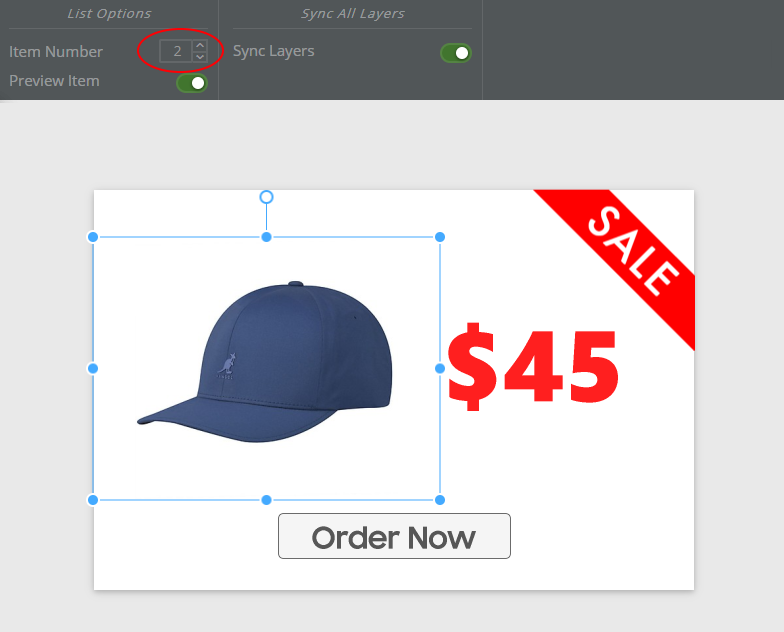
For this example we are using the Hats list. Once you add one or more list items, you can control which Item Number you want to display in your image.
That way you can predict which item is shown by sorting your List by Price, Discount, what is On Sale, Inventory, Discount, etc..
Note: You can create a list of anything, not just products. If you created a list of your blog articles, you could always show the newest article in one image, and the second blog post in another image.
Filter items from a List with a specific property.
The example below will filter all the items from the Product list where the Category is equal to Hats.
This is valuable if you had a List of all your products (for example) but you wanted to target the Hats.
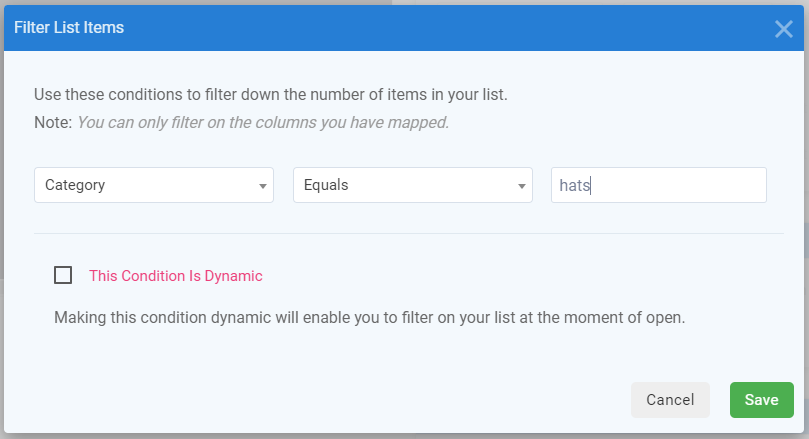
You can create as many Lists from the same array as you would like.
IE: Hats List, Shoes List, Pants, etc...
Create Custom Fields for your Lists to Filter, Sort and display in your image.
You can create the following fields:
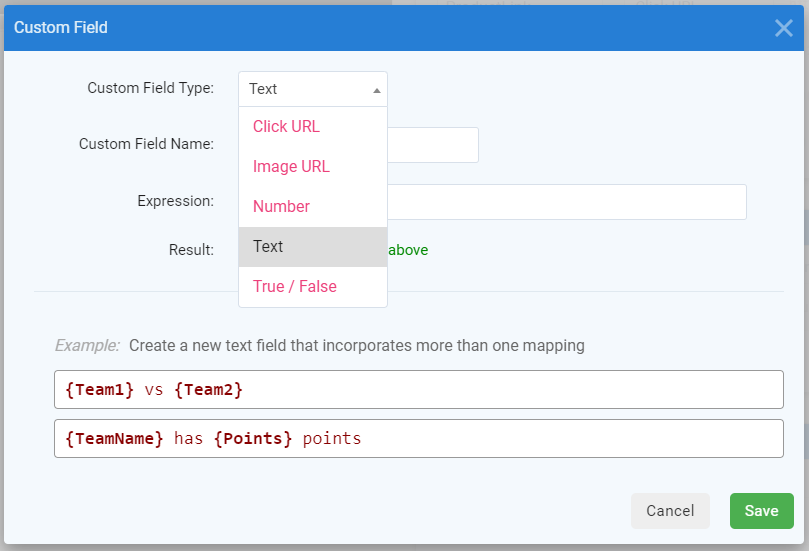
The example below will create an On Sale field that we can then Filter on.
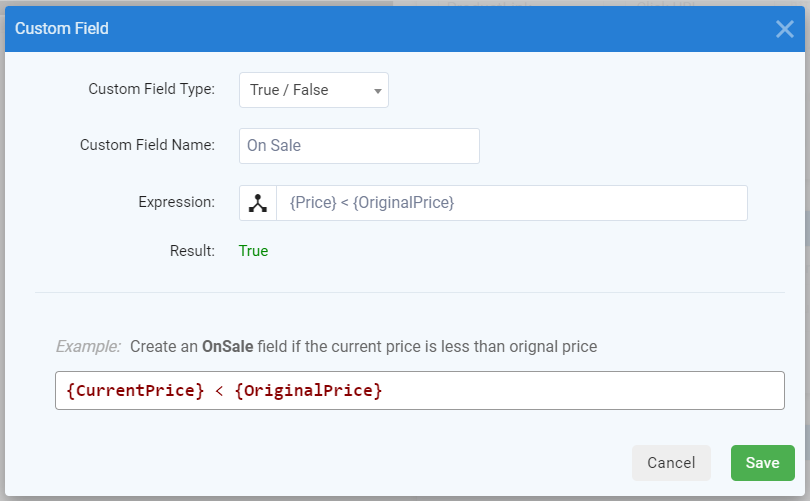
Now we could add a filter like our Category equals Hats example above to create an On Sale List for just Hats.
You can sort lists so that the appropriate item shows up in the correct spot.
In the example below we are ording by a custom field Price Discount which we created using {Original Price} - {Current Price}.
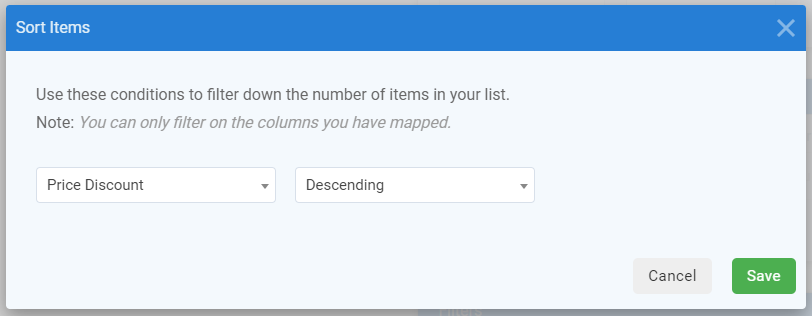
Imagine ordering your list of products by Sale Price, Inventory, Discount, etc...
Order your blog posts by Post Date, or a Weather API by Day of the Week.
You can make a filter Dynamic. Imagine you sell soccer jerseys for all the teams in the English Premier League.
Create a list that orders your products by the Best Selling, or Inventory Left.
Now you can create a Dynamic Filter to show the appropriate item to each receipient of an email campaign using the following:
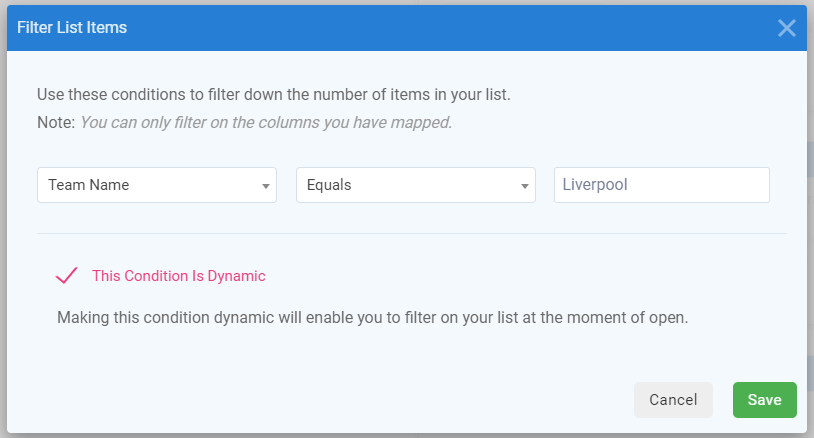
You can now send an email campaign to everyone on your list and use a merge tag so they see their favorite team, something like this:
<img src="https://img1.niftyimages.com/yourimagepath?teamname={ESP_MERGE_TAG}" />
Another Example: Imagine your company had an API of all cars that your lot sells, use a Dynamic Filter to show the appropriate vehicle using the VIN Number as follows:
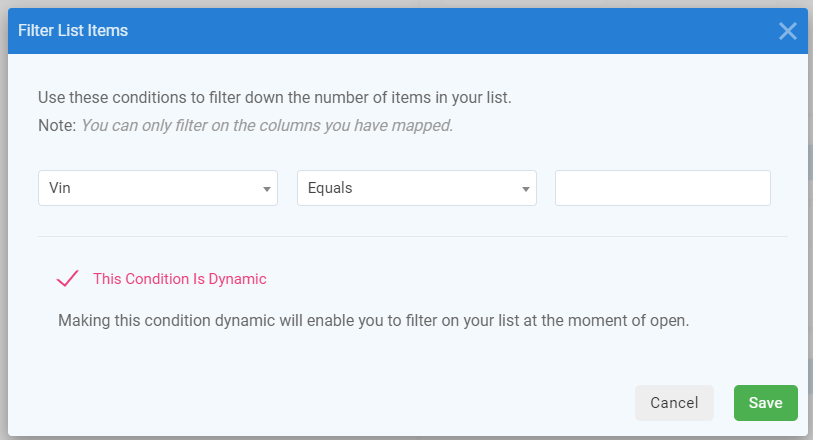
The email you send would look something like:
<img src="https://img1.niftyimages.com/yourimagepath?vin={ESP_MERGE_TAG}" />
You now have the ability to create advanced charts in the New Editor
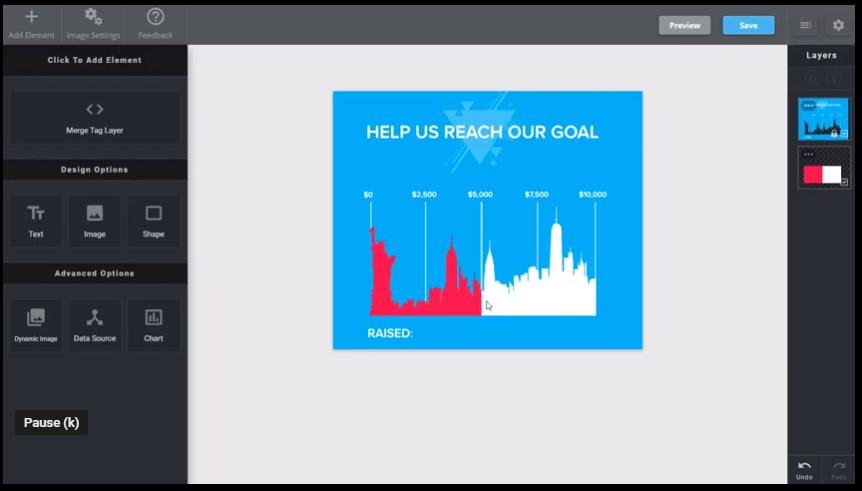
We added some example images and videos to help you get started and realize the power of our New Editor
View Examples Below:


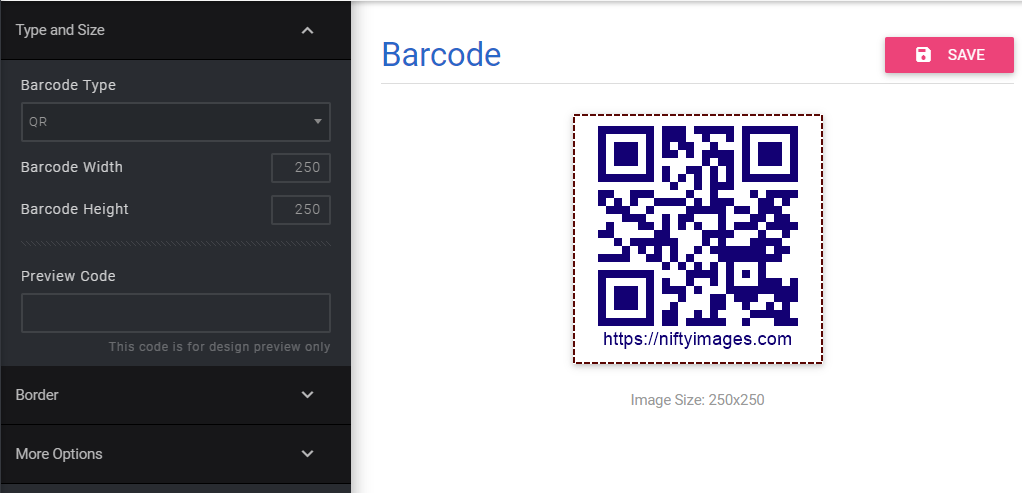
Use a MERGE TAG from your ESP to dynamically create a unique barcode for each subscriber. You can even hookup a Data Source to your barcode so everyone receives their own personal offer.
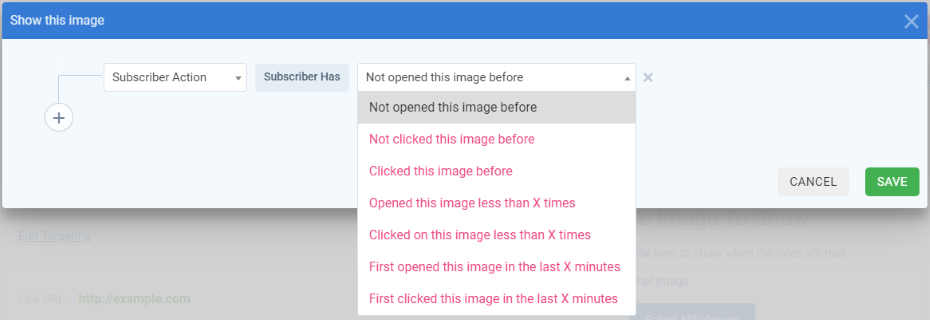
You can now add rules based on subscriber actions.
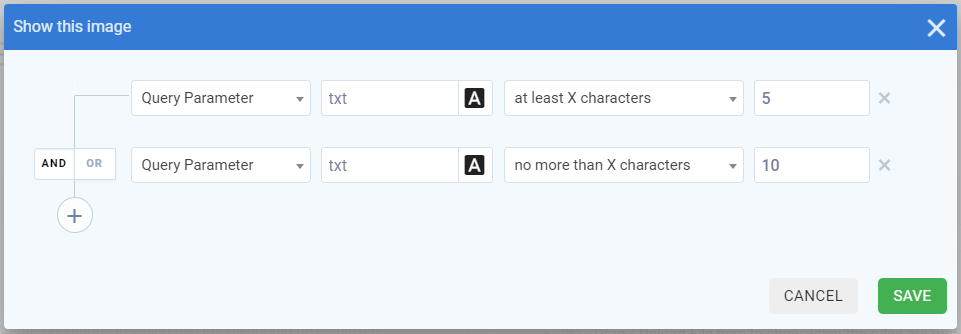
You can now add rules that inspect the character length of query parameters.
The rule below will show the image if the Query Parameter txt is between 5 and 10 characters.
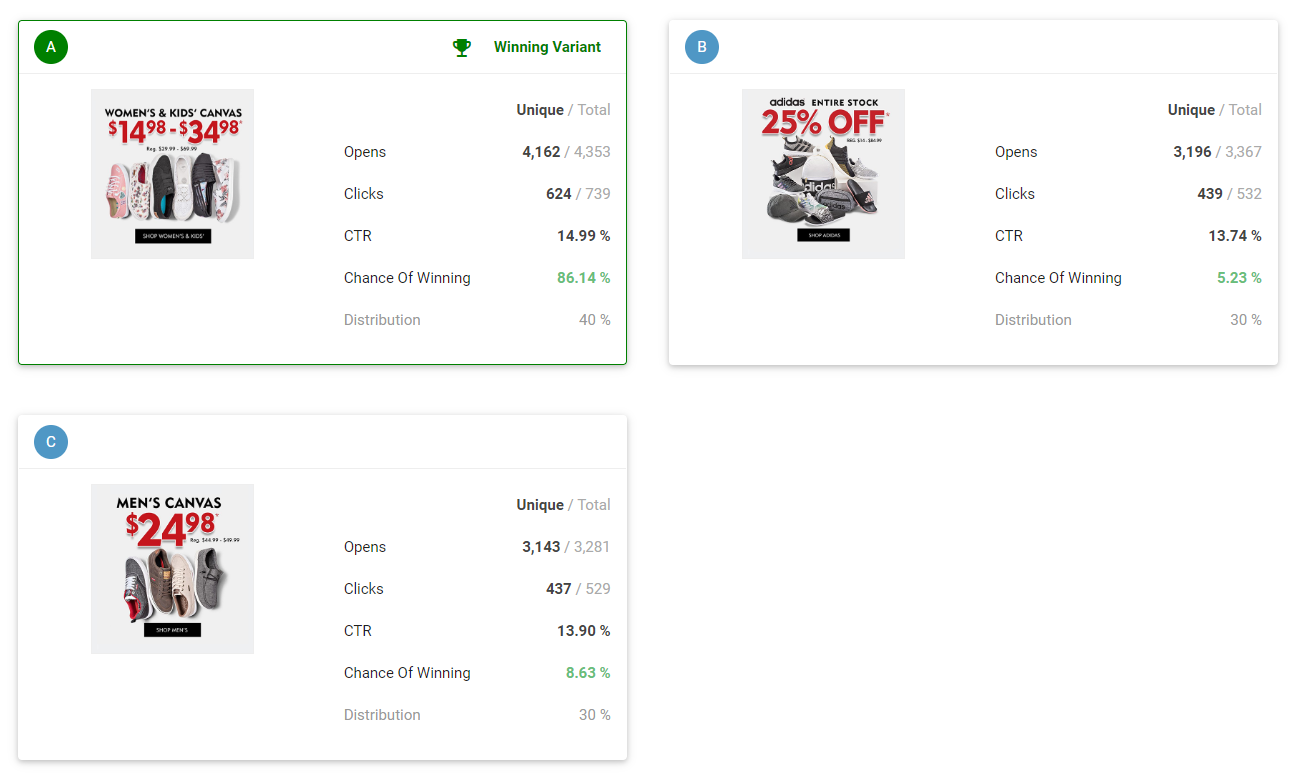
Traditional split tests send a static variant to different portions of your list, missing the opportunity to show the winning variant to late openers or those that re-open your email. With the long tail of email, we allow you to re-engage subscribers with the winning varian, once determined.
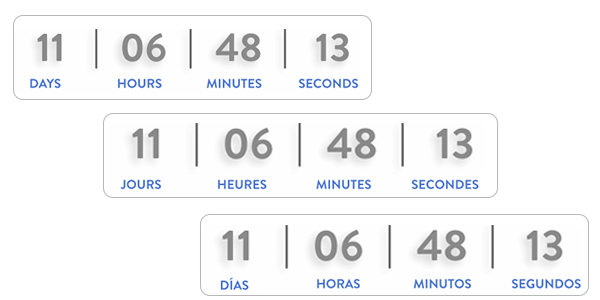
Both new features Adjust to Local Time Zones and Use Local Language can now be done with the simple check of a box.

Subscribers in New York, Chicago and Los Angeles will all see different countdowns based on their local time zone.
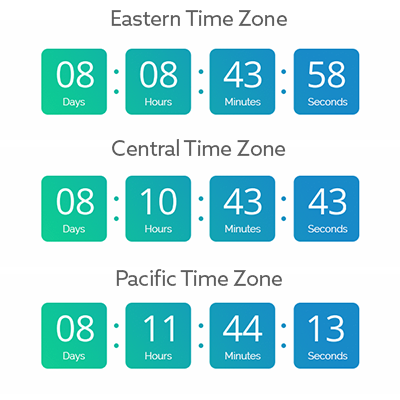
If we can determine the recipients location, we will change the labels of your timer to the dominant language of that region/country.
You can now add Titles to any chart. This includes the ability to personalize the title using an ESP variable or Data Source.
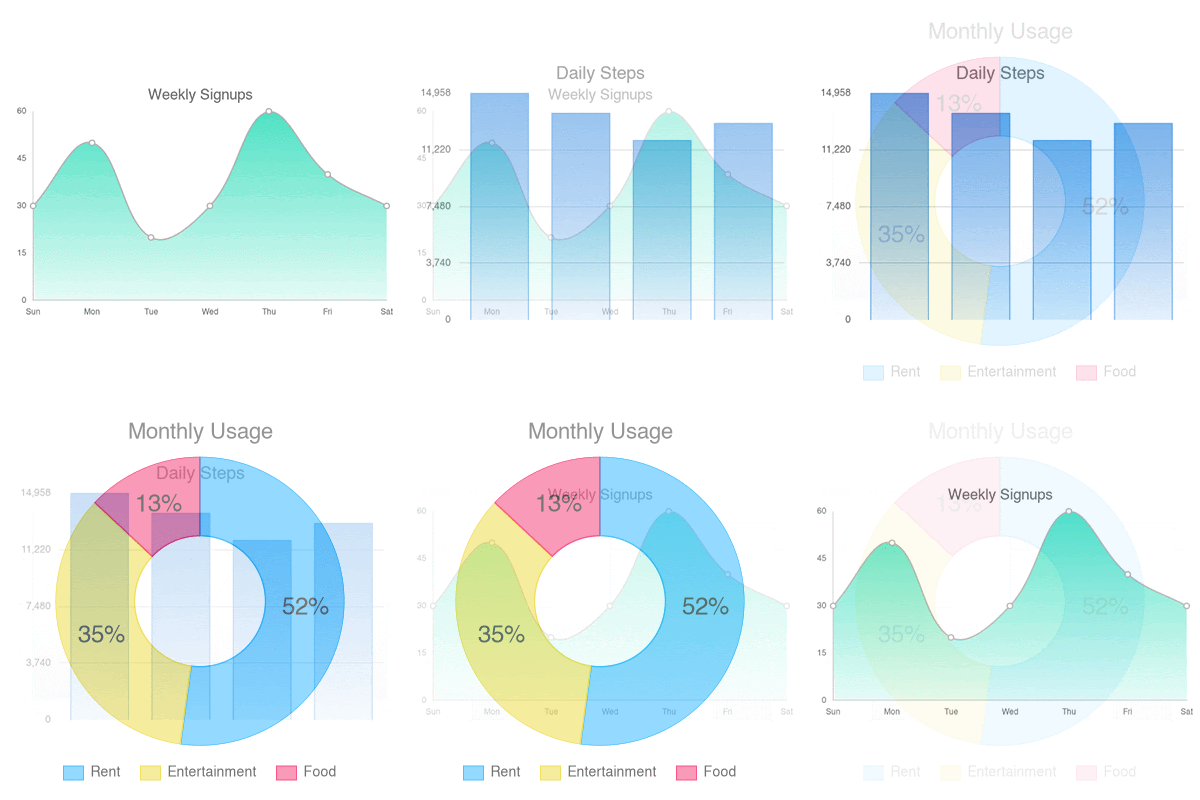
Creating personalized charts will allow your email subscribers to get a more visually engaging representation of their personal data, compare their data to larger trends and quickly grasp the meaning of this data without analyzing their numbers.
Charts have always been a challenge to include in emails due to the complexity of the design and challenges that come with the multitude of options… until now!
Read More Here
Along with addHours, you can now use addMinutes to dynamically adjust your timer.

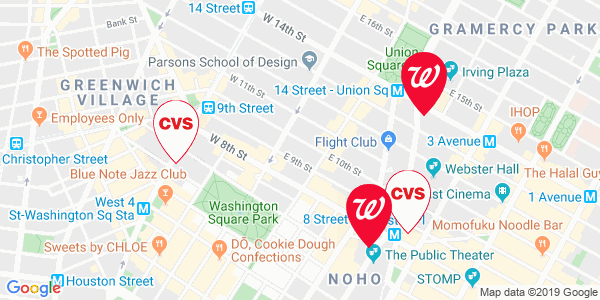
Each location on a Map can now have it's own unique Icon. Simply map the appropriate column when importing your locations.
You can now add rules that compare inputs a list of values.
The image below show the image if the Query Parameter areacode is any one of the following: 916, 209, 802; or the recipients Location is any of the following Zip Codes: 95742, 10001, 85001

Our Maps feature will allow you to custom design your map, import a list of locations and make a few quick selections to complete your map in under 5 minutes!

You can now show external images (from your website) in Rule Sets.


Leveraging real-time Data Sources gives you the ability to create content that is always relevant and up-to-date at the moment of engagement. Now NiftyImages allows you to use Google Sheets or upload a CSV, in addition to our API options.
Read More Here


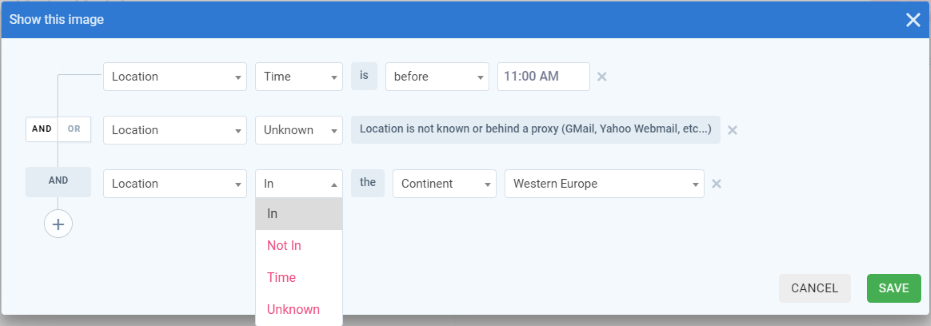
You can now show images based on the Recipients Local Time. i.e. Good Morning, Good Afternoon and Good Evening depending on the time local to the machine viewing the image.
We've also added the option of filtering on the existence of a valid IP Address. There are some scenarios where the IP Address of the subscriber can’t be validated because they are behind a proxy such as Gmail or Yahoo’s webmail interfaces.
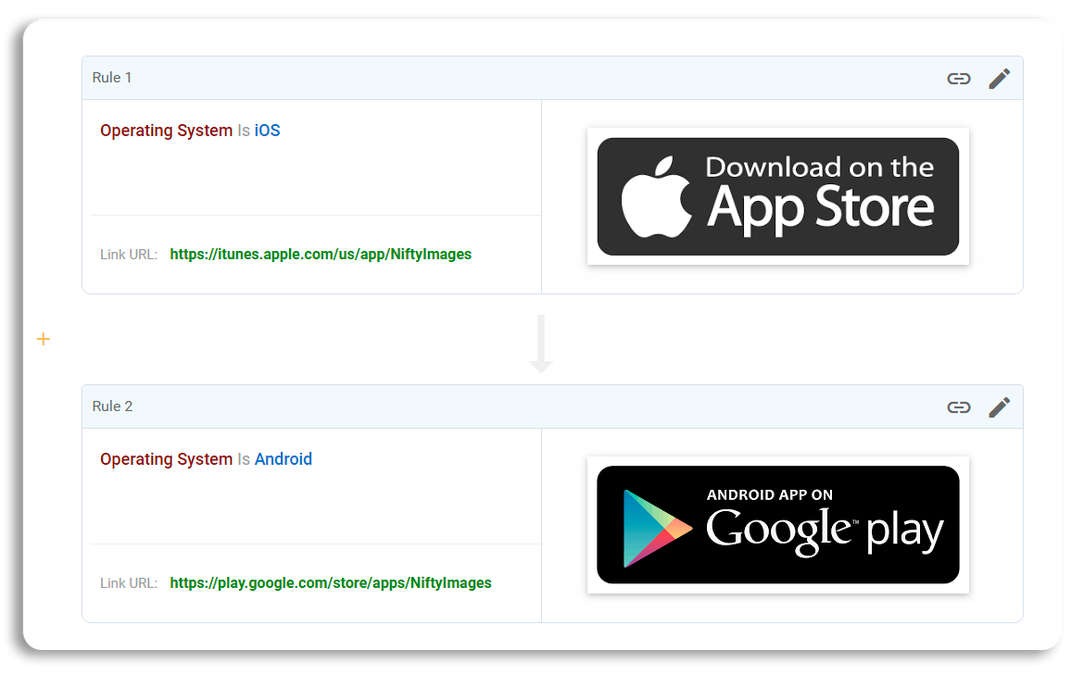
You can now link your NiftyImages directly in your account to any website/landing page. You can really do some amazing things such as:
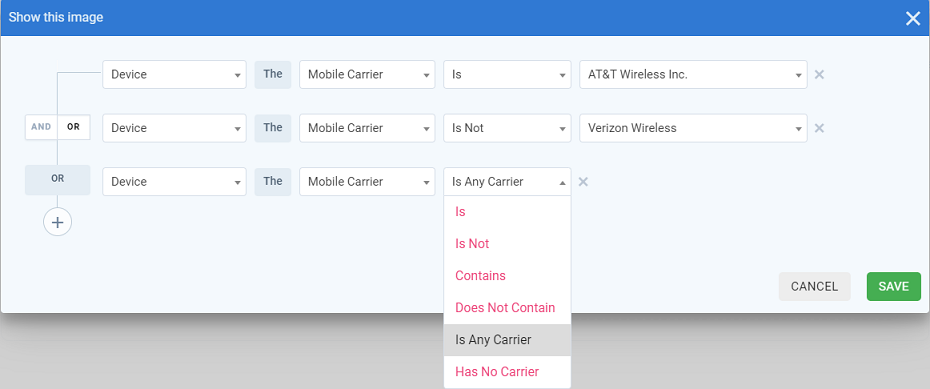
You can now filter on the Mobile Carrier in Rule Sets.
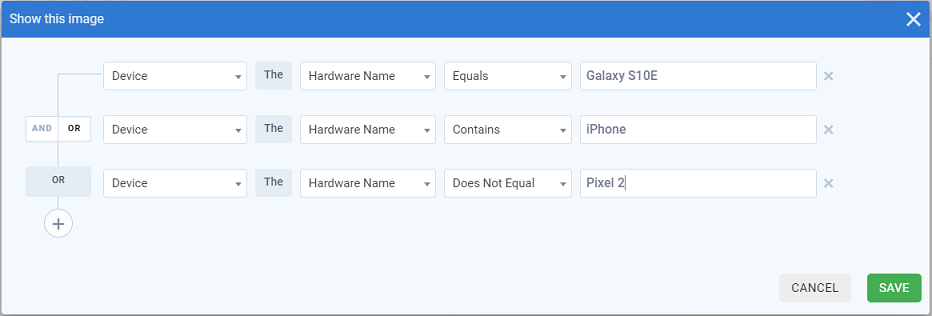
You can now filter on the Hardware Name in Rule Sets.
Show a different image to each recipient if they have a Galaxy S10, Galaxy S10E, a specific iPhone (or any iPhone version), Pixel 2, etc...
You can now filter on the raw User-Agent strings in Rule Sets.
Search raw User-Agent string for keywords (ie: Contains iPhone, Does Not Contain Outlook, etc...)

You can now filter on the Hardware Vendor in Rule Sets.
Show a different image to each recipient if they have a specific Hardware Vendor (ie: Apple, Samsung, Sony)

You can now filter on the Location of a recipient in Rule Sets.
Show a different image to each recipient if their IP Address is in a specific Continent, Country, City, State/Region, Area Code or Zip Code.

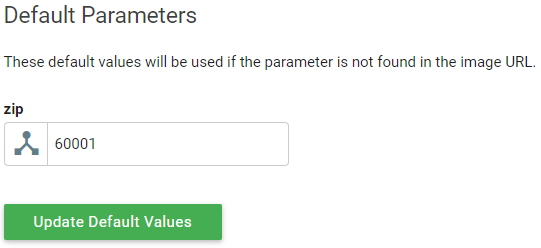
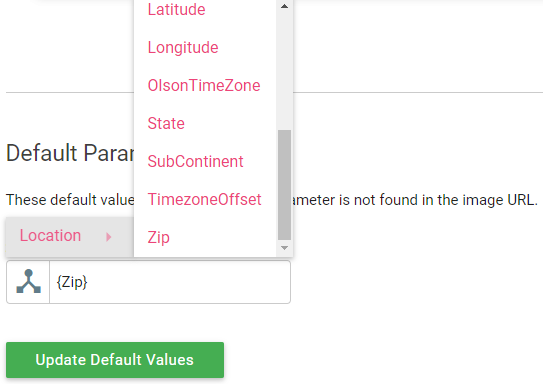
Real-Time Data Sources can now have default parameters.
The first screenshot below specifies a default of 60001 to use for the Default Parameter if the Zip query string parameters is not specified in the URL.
The second screenshot uses the variable {Zip} as the default parameter. If there is no query string parameter found in the URL, it will use the Zip Code of the recipients IP Address.
 |
 |
You can now filter on a Data Source value in Rule Sets.
Create conditions based on both Polling and Real-Time Data Source values (ie: Show image if Temperature is greater than or equal to 60 degrees)

You can now show or hide Photoshop Layers based on Data Source values.
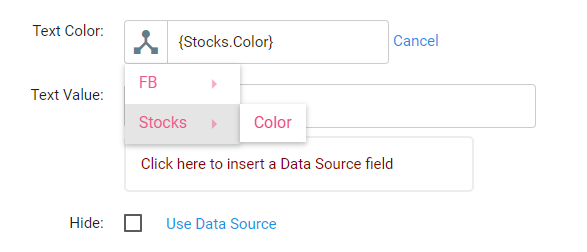
You can now set the color of Text Layers and Shape Layers based on Data Source Values.
Create Custom Fields to format numbers, massage data, or create new fields based on conditions or text merges.
Show a different image depending on the current device a recipient is using.

Real-Time images that are created at the moment a subscriber opens your email, using any API to update text and images.
